REACHING STUDENTS IN A NEW CLASSROOM ENVIRONMENT
Since most schools are closed and millions of children stay home, digital learning has become the new standard. Teachers are looking for ways to interact electronically with their students and allow them to learn in meaningful ways. Nowadays, teachers can create a virtual learning environment wherein students and teachers have interaction. One of the famous platforms used for this purpose is Google Classroom. But did you know you can do it in Canva? Yes! You can create classes in Canva.
Canva Class, as a digital learning resource, is a strategy that can be both productive and narrative which can be a medium to present a lesson. It is also adaptive as it can be utilized in virtual worlds or models to be used by the students. This feature in Canva is very communicative in a way that it involves peer discussions or brainstorming in which you can use discussion boards and templates. Lastly, students become more productive in expressing their output creatively by exploring various ways of presenting them. Furthermore, this feature can either be of low bandwidth yet high immediacy or low bandwidth and low immediacy.
SETTING UP YOUR CLASS
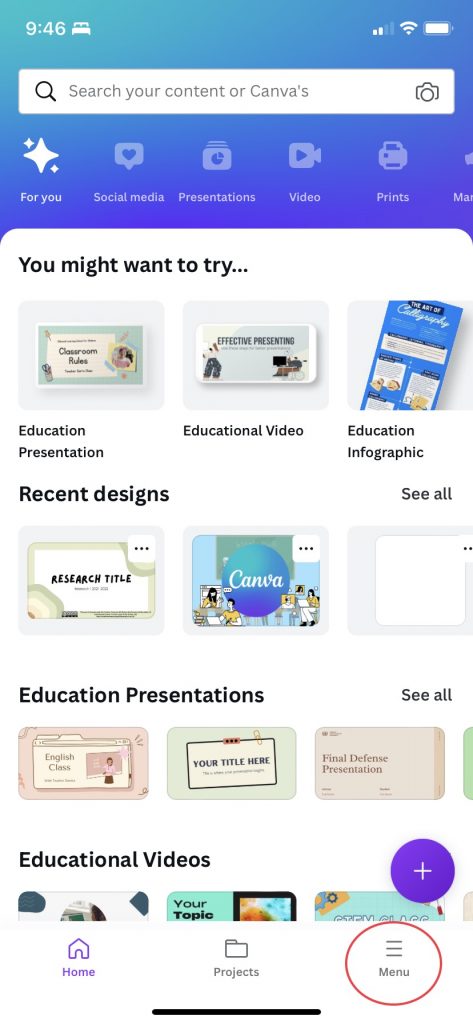
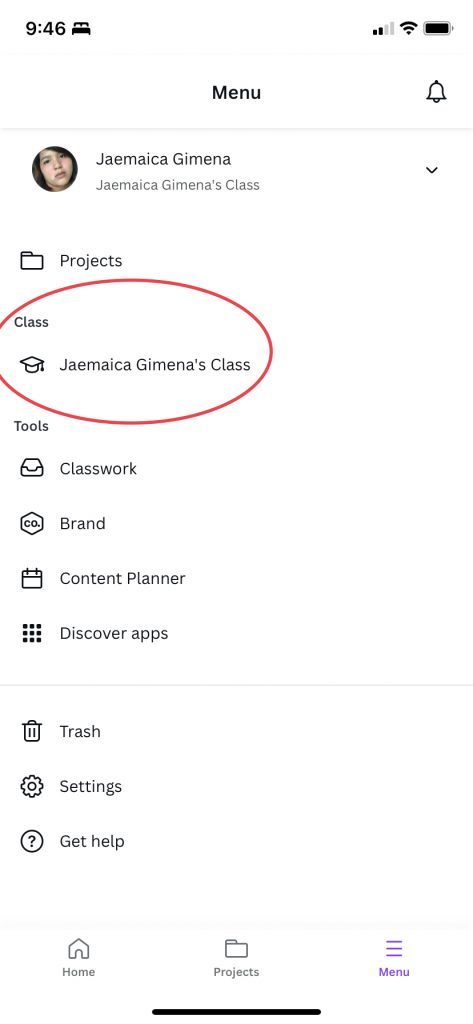
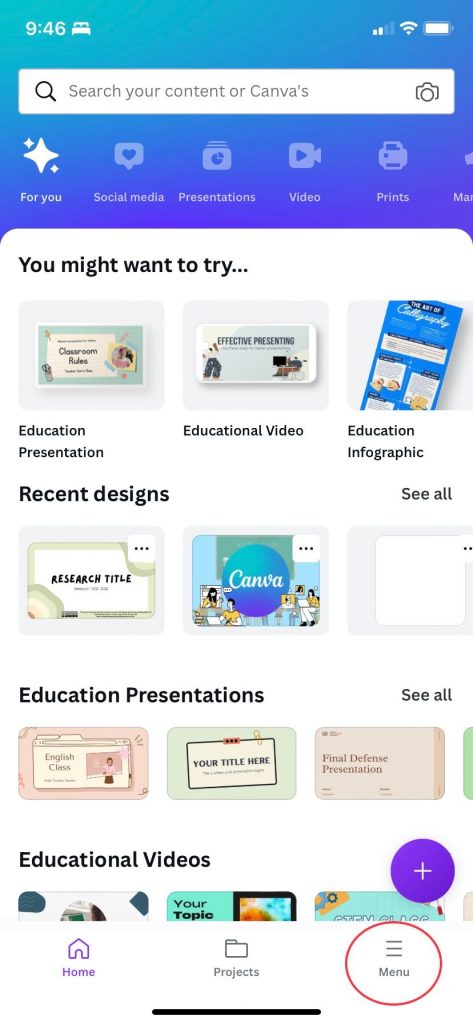
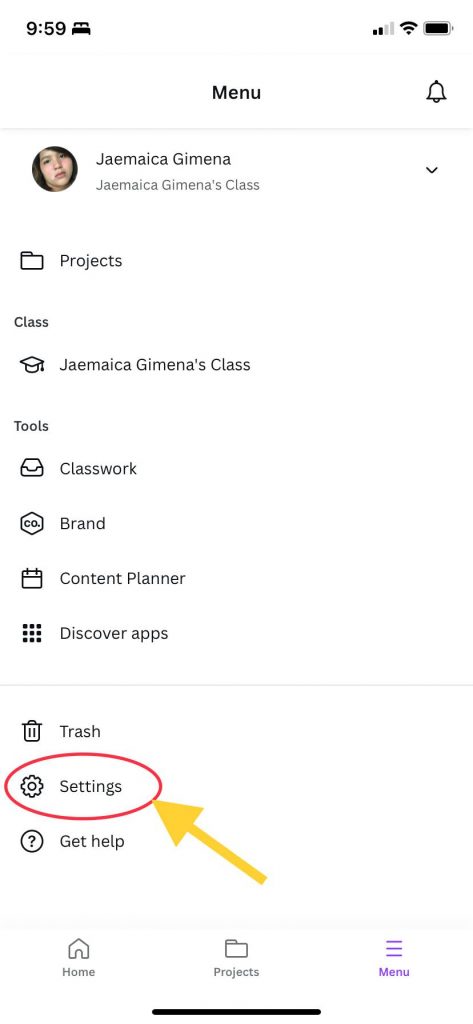
If you are using your mobile in setting up your classes, here’s how to do it:
- In the menu button (≡), under the Class section, select “class”.
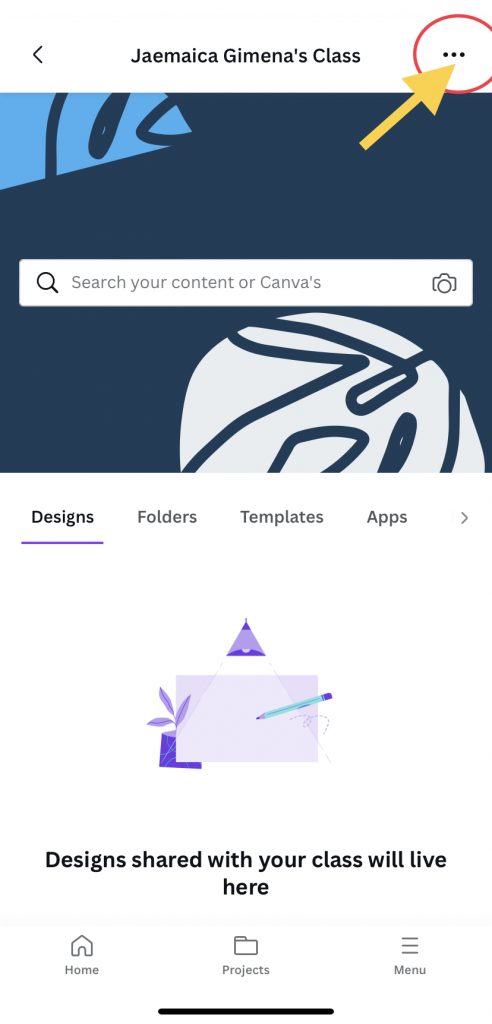
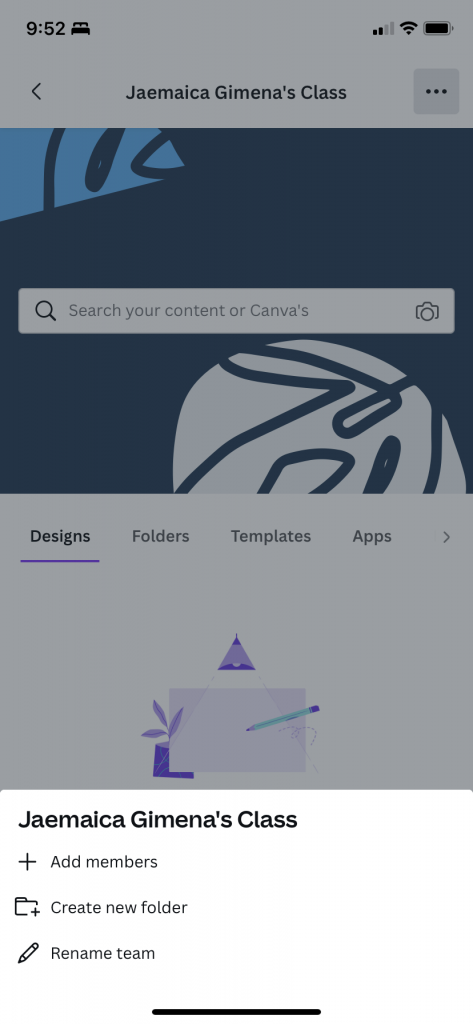
- From the top corner of the class banner, click the ••• button, you can modify the class’s name and add members or folders.
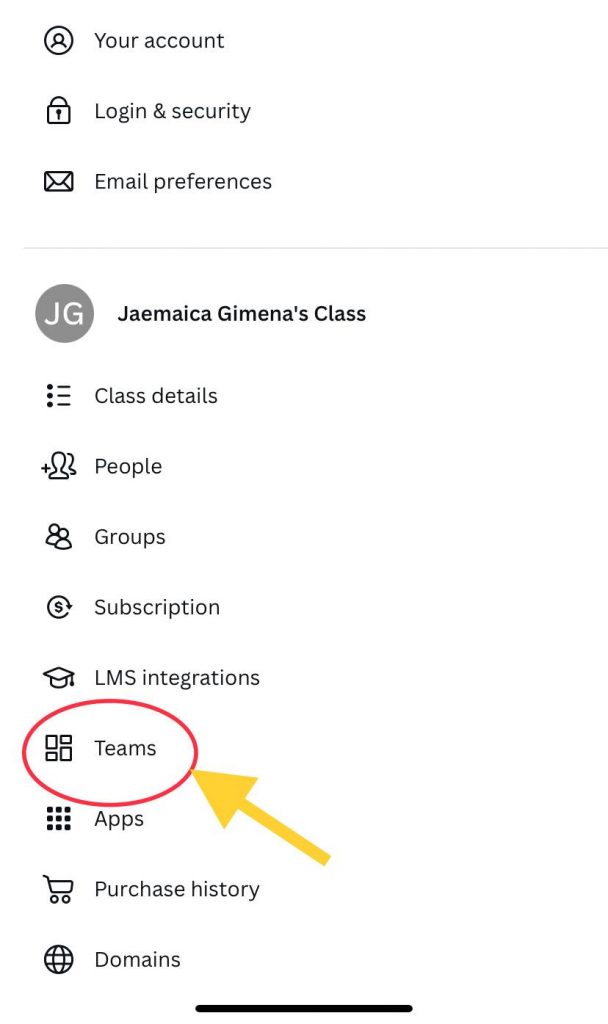
3. If you want to add more classes, tap the menu button (≡) and click Settings.
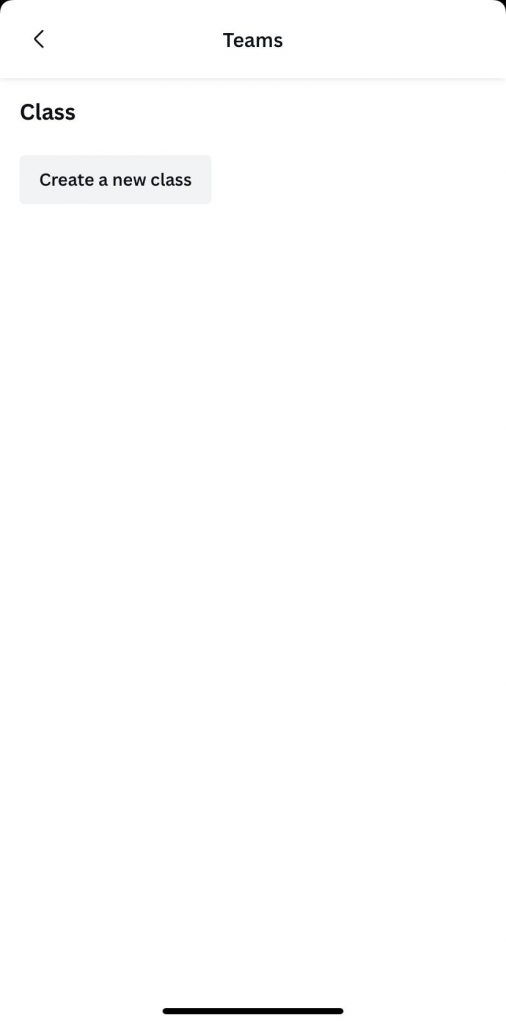
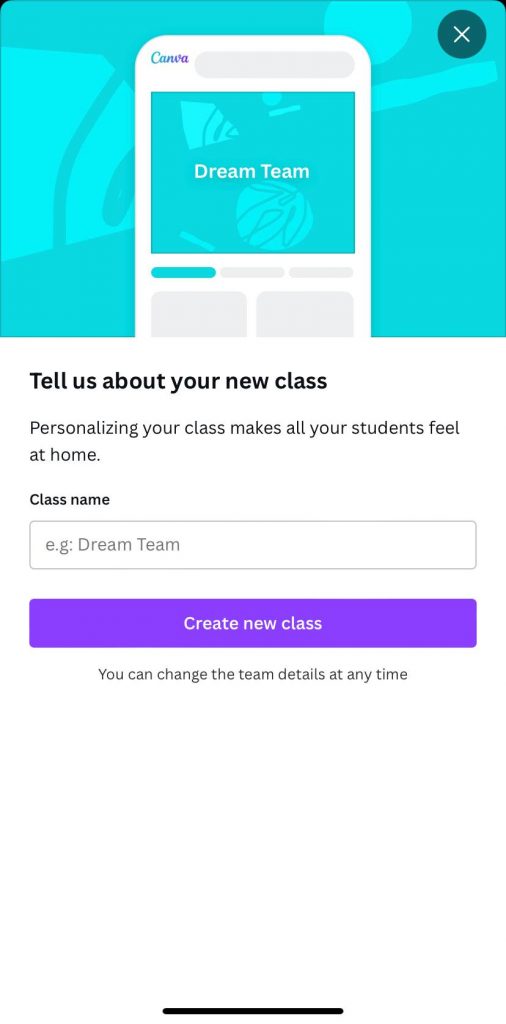
4. Click Teams and click Create a new class. You may now set up your class.
If you are doing it in a desktop, here’s how to do it:
- In the menu button (≡), under the Class section, select “class”.
- From the top corner of the class banner, click the ••• button, you can modify the class’s name, banner and add members or folders.
- If you want to add more classes, click the ⚙ gear icon on top.
- Click the Billing & Teams.
- Under the Class section, click “Create a new class” You can now setup your class.
ADDING YOUR STUDENTS IN THE CLASS
To add the students in your class, here’s how to do it:
- Go to your class. Under the class banner, click People.
- There are four ways to add your students to the class:
- Invite via link.
- Invite via code.
- Import from Google Classroom (if you are creating in desktop).
- Log in with your Google Classroom.
- Select the class you want to import. This will automatically import the students’ email addresses.
- Click Send Invitations to finish.
- Input their email address. Send invitations once you have input all of their email address.
CREATING ACTIVITY FOR YOUR CLASS
- In the menu button (≡), under the Class section, select Classwork.
- In the Classwork page, select New Activity at the top.
- Choose an activity template to use such as graphic organizer, worksheet, brainstorming, group work, etc.
- Once you have selected an activity, it will direct you to the editing page.
- Edit the title of the activity on the left side of your profile picture, found in the upper right corner of the editing page. You may also add more text, instructions or designs. If you are using a mobile, you can rename the activity by just clicking the ••• button at the top and then edit the title.
- Click the Assign button in the upper right corner once done editing the template. If you are using mobile, click the up arrow on the upper right corner and click Assign.
- Choose where the students should submit their work and select the file type to be shared. It can either be:
- New design for each student. It will be shared as a template and each student will receive a fresh copy of the design to work on.
- Instructions only. Students will receive the design like a set of instructions and they won’t be able to edit it and create a blank design.
- Work on this design. Students will be linked directly to this design to complete work. No copies will be made.
- You can let the students submit their work either through Canva class, Google Classroom, Microsoft Teams, or on your Learning Management System.
- Once you have chosen, click Publish. Just follow the instructions depending on the platform where you want the students to submit their work.


